

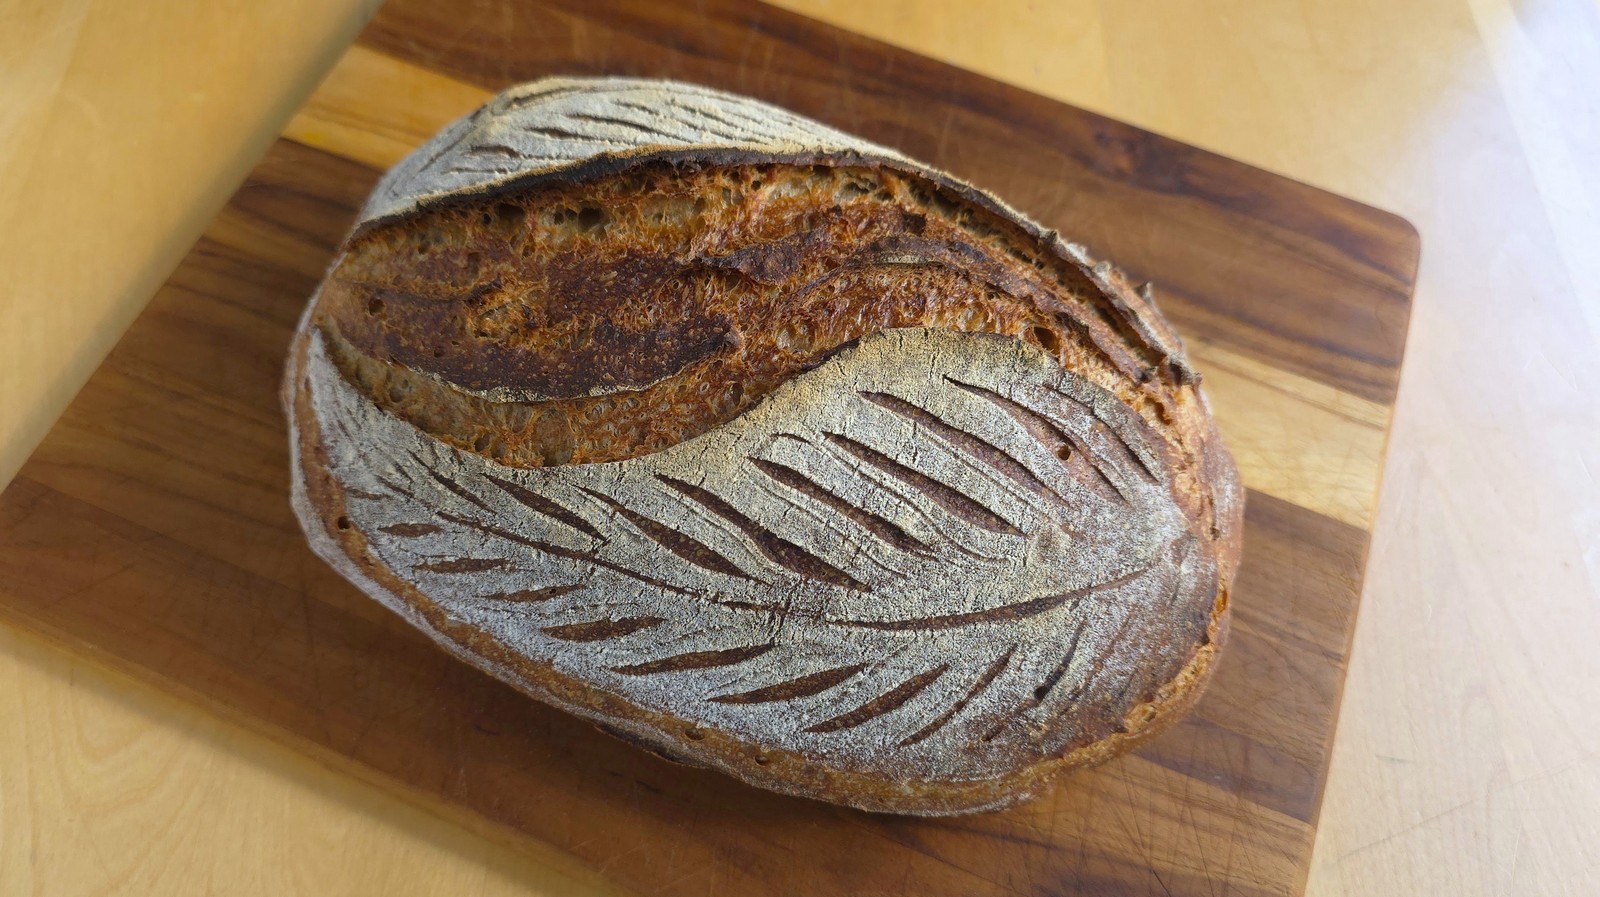
This week we experimented with our Breadtopia Select Sourdough, testing a higher hydration dough and more extensive fermentation and proofing. These breads are all made with our select organic bread flour, which consists of hard red spring wheat berries that are stone milled, then the flour is sifted to land about halfway between whole grain and white flour. Breads made with this flour are flavorful and airy—at both hydration levels we tested. The original recipe is 76% hydration (500 grams flour, 380 grams water) and our variation below is 82% hydration (450 grams flour, 370 grams water).
It is notable that there is not much of a difference in the crumb between the 76% and 82% hydration breads (normal fermentation). The higher hydration dough was still easy to handle even in the test bake where we took the fermentation and final proof quite far. In the photos above, you can see that the extra-fermentation-proofing bread has a more irregular crumb with some large holes likely from tearing of weakened gluten strands. That dough more than doubled during the first rise while the normal dough (second row) expanded by about 1.75x. The final proof of both 82% hydration doughs were long (17 and 19 hours, respectively), but because the over-fermented dough was already farther along the fermentation curve, it ultimately began to look flat in the basket.
The photo galleries after the recipe show the dough stages and the video below depicts the steps for the optional scoring of leaves on the dough.
High Hydration Select Sourdough


In this recipe, we’ve taken our tasty and airy Breadtopia select sourdough formula and upped the hydration. This didn’t make a dramatic change to the crumb, but this always flavorful bread has a bit more moist chewiness at 82% hydration.
Ingredients
Baker’s Percentages
- 100% high extraction hard red spring wheat flour
- 82% water
- 16% sourdough starter
- 2% salt
Instructions
- My normally fermented dough rose for ~ 7 hours at 70°F, and the final proof was 17 hours in the refrigerator. You should modify this timing as needed with different ambient/dough temperatures and starter strength.
- In a large bowl, add the flours, water, sourdough starter, and salt. I used an Ankarsrum mixer with the roller attachment. Mix thoroughly and transfer the dough to a straightwalled bucket if available. Note the level of the dough and cover.
- Do several rounds of gluten development after the dough has rested 20-30 minutes, and with 20-30 minute rests in between. I did the following three: lamination, stretch and fold, and coil fold. You can learn more about these gluten development maneuvers here.
- Let the dough rise until it is about 1.75x the original size (see the photo gallery).
- Transfer the dough to a lightly floured work surface and shape it to your preference (boule, batard, oblong loaf). Make sure to build tension on the surface of the dough and dust it with flour before placing it seam up in a proofing basket.
- Cover the basket and let the dough rise again. See gallery. If you prefer to bake same-day, let the dough proof at room temperature for 1-2 hours. To bake the following day, refrigerate the dough 8 or more hours.
- Preheat your oven and baking vessel to 500°F for 30 minutes.
- Flip the dough out of the proofing basket and onto a sheet of parchment paper or a silicone bread sling. Score and load the dough into your baking vessel and oven.
- Bake at 500°F with the option to uncover and re-score your “oven spring” cuts at the 7-minute mark and put the lid back on afterward.
- At the 20-minute mark, reduce the oven temperature to 450°F and remove the lid. Continue baking another 10-15 minutes.
- Let the bread cool before cutting. Store cut-side down on a cutting board, under a glass bowl, or inside a bread bag or box.
Photo Gallery 82% Hydration, Normal Fermentation and Proofing
-

- End of first rise

-

- Start of final proof

-

- End of final proof

-

- Scoring pattern