
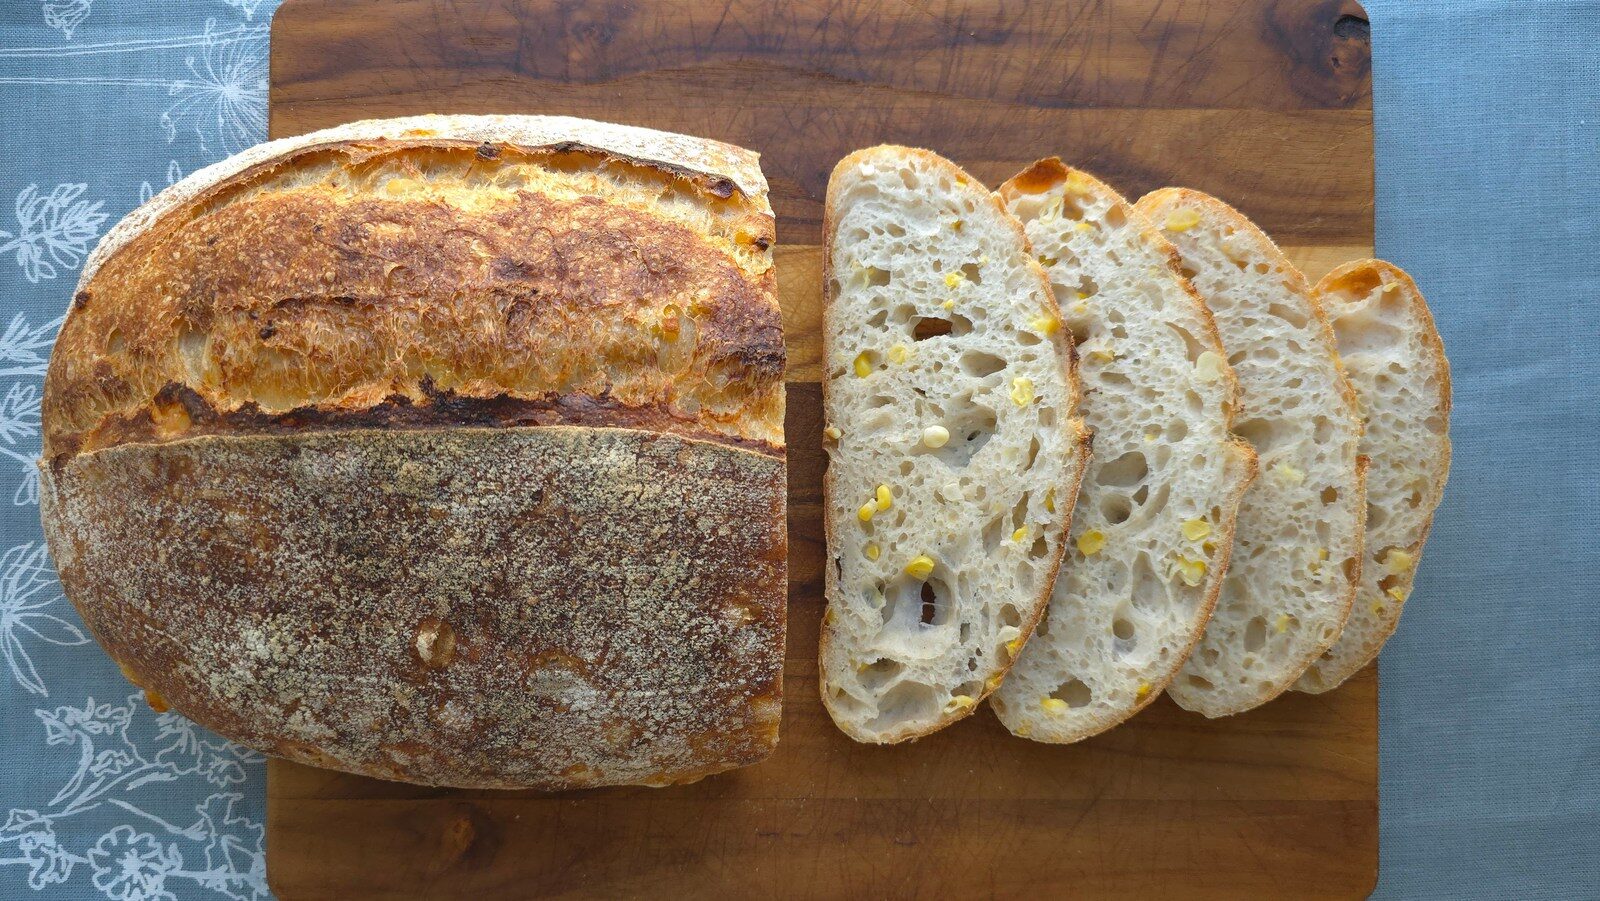
Here’s a fun and tasty artisan style bread that maximizes corn flavor with both field corn porridge and sweet corn kernels. It makes a great table bread alongside late-summer vegetable dishes or used for sandwiches, toast, and even French toast. Field corn, such as yellow dent or bloody butcher, can be milled fresh for the porridge or you can use storebought fine cornmeal. For the corn kernels, canned is okay but if possible, use fresh or fresh-frozen because they’re sweeter and more flavorful.
Every year toward the end of summer, I like to buy a dozen ears from a local farmstand to boil, cut, and freeze. I use the corn in soups, bean salads, cornbread and more. Last week I was loading my freezer with new stock and saw that I still had a small bag of last year’s corn. Thus was born this bread—and my leftovers of Persian fesenjan, a dish with ground walnuts and pomegranate molasses, got some corn too.

Harvest corn sourdough alongside Persian fesenjan, also reimagined with corn
If you process fresh sweet corn like this, don’t forget to scrape the cobs with the back of your knife to get all the sweet corn milk and note that the blanching step is important to shut down the enzymes that would change the flavor and texture of the corn even in the freezer.
Below is a video showing the step of laminating the corn porridge and kernels into the dough about an hour after mixing and how the dough develops with two rounds of stretching and folding. You might notice that I used a white dent corn that is a bit paler than yellow dent corn.
Check out the Photo Gallery after the recipe for more photos.


Enjoy the two kinds of corn flavor in this sourdough bread that uses both field corn and sweet corn. Try it with fresh milled yellow dent corn or storebought cornmeal and sweet corn from the cob if possible. The end result is an aromatic and tasty bread with extra bursts of corn flavor.
Total Time
1 hour, 15 minutes
Ingredients
Field and Sweet Corn Porridge
- 60 grams fine cornmeal/flour, home milled yellow dent corn or other field corn (rounded 1/2 cup)
- 100 grams boiling water (1/3 cup + 1 1/2 Tbsp)
- 120 grams sweet corn kernels (3/4 cup)
Dough
- 390 grams bread flour (3 cups) *
- 280 grams water (1 cup + 3 Tbsp)
- 80 grams sourdough starter (1/4 cup)
- 9 grams salt (1 1/2 tsp)
- All of the cooled porridge
Baker’s Percentages
- 100% bread flour
- 72% water
- 21% sourdough starter
- 2.3% salt
- 41% corn porridge (15% fine corn flour/meal and 26% boiling water)
- 31% sweet corn kernels
Instructions
- Setting up the corn porridge takes just a few minutes. The dough needs 4-6 hours for the first rise in kitchen temps in the mid-70s Fahrenheit. For the final proof, plan for 30 minutes to 2 hours, room temp dependent, or put the dough in the refrigerator overnight.
Field and Sweet Corn Porridge
- In a small bowl, mix the cornmeal/flour and boiling water. Add the corn kernels and cover while it cools.
Dough
- Combine the dough ingredients minus the corn porridge in a bowl and mix until the dough comes together. If using a mixer, run it on medium speed for 5-10 minutes. If mixing by hand, rubaud mixing for several minutes will serve the same purpose of gluten strengthening.
- Cover and let the dough rest 30-60 minutes. Add the field and sweet corn porridge by laminating the dough on a clean work surface. See the video above for guidance if needed. Return the dough to the fermentation container, cover, mark the level of the dough, and let it rest about 30 minutes.
- Do 1-2 rounds of stretching and folding with 30-minute rests in between, to better distribute the porridge and eliminate very large air pockets.
- Let the dough rise by 50-75%. (In the photo gallery, you can see I marked the dough level before adding inclusions so it looks like I let it expand by about 125%.)
- Place the dough on a lightly floured work surface and shape it into the form that works for your proofing basket and baking vessel: boule, batard, oblong loaf.
- Place the dough in a proofing basket, seam-side up. Cover and let it proof until it has expanded. See the photo gallery for before and after pics. This can be at room temperature for 30 minutes to 2 hours (ambient temp dependent) or overnight in the refrigerator as was the case with my dough.
- Preheat the oven and baking vessel to 500°F for about 30 minutes.
- At the end of the final proof, flip the dough out of the basket onto parchment paper or a silicone sling, score, transfer to the baker, cover, and put in the oven.
- Bake at 500°F covered for 20 minutes, 450°F still covered for 10 minutes, and an additional 5-10 minutes uncovered at 450°F. The internal temp should be >205°F.
- Let the bread cool before slicing. Store cut-side down on a cutting board, under a glass bowl, inside a bread box, or in a beeswax wrap bag. Aim to use or freeze the bread within 3-4 days because of the inclusions.
Notes
* Breadtopia’s bread flour has 13.5% protein. If you’re using a bread flour with less protein, reduce the water in the dough.