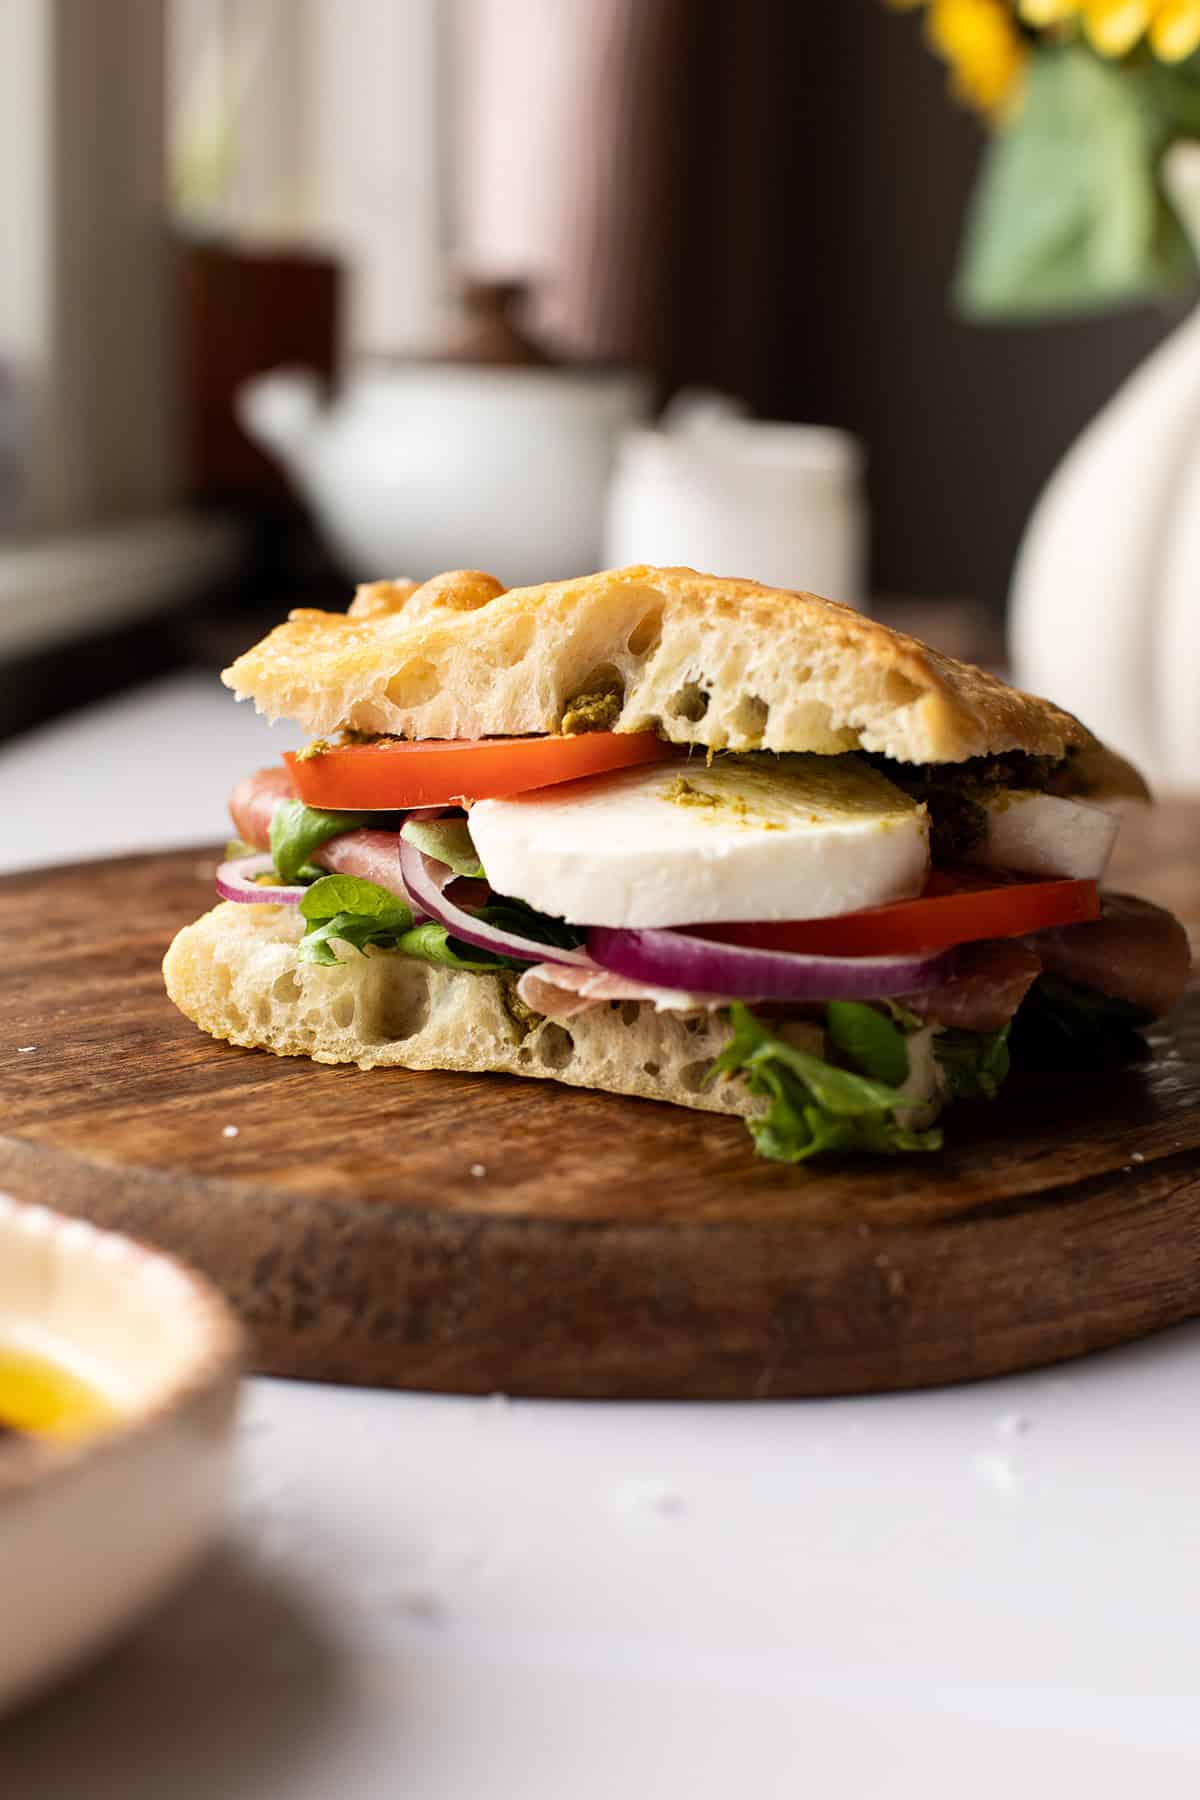
There is something magical about a freshly baked focaccia. The golden, olive oil-covered crust, the soft and airy interior, and those irresistible little dimples that hold pools of flavorful olive oil make it one of the best breads you can make at home.
This focaccia recipe is designed to give you a light, fluffy crumb while still being sturdy enough to use for sandwiches. It is not just a side dish for dipping into soup or serving with dinner – it makes an incredible sandwich bread that can take your lunch to the next level.
The dough is simple, but a few techniques make all the difference: using a high-protein flour, giving the dough time to develop flavor, using stretch and folds instead of heavy kneading, and not being afraid of olive oil. Lots of olive oil is what gives focaccia its signature texture and flavor.
Why you’ll love this recipe
Focaccia is a traditional Italian bread that has been enjoyed for centuries, especially in regions such as Liguria, where the famous focaccia Genovese originates. It is similar to pizza dough but usually has a thicker, softer texture and a generous amount of olive oil.
This bread is especially popular during summer when fresh herbs, tomatoes, and seasonal vegetables are at their best. It is versatile so you can top it with nothing or with the veggies and herbs in season.
It is also a favourite for gatherings because it can be baked ahead and easily served as an appetizer, lunch, or part of a larger meal.
Focaccia pairs beautifully with Italian-inspired recipes such as a fresh Caprese salad, homemade pasta dishes, soups, or grilled meats. It is also perfect alongside a selection of cheeses, cured meats, and antipasti for a simple but impressive sharing board, as a dish for tapas with aioli.
The best part? Homemade focaccia is much easier than it looks. The dough is very forgiving, and the long resting time does most of the work for you.
Ingredients
Water: Lukewarm water activates the yeast and helps create a soft, stretchy dough. The ideal temperature is around 80°F to 100°F (27°C to 37°C). Depending on your flour, you may need slightly more or less water because different flours absorb moisture differently.
Salt: Salt is essential for flavor and also helps strengthen the gluten structure in the dough. Without enough salt, focaccia can taste flat and the texture will not be as good.
Extra virgin olive oil: Olive oil is one of the defining ingredients in focaccia. It adds flavor, keeps the bread moist, helps create the golden crust, and gives the finished bread its characteristic richness. Do not be shy with the olive oil – focaccia should be generously coated!
Dried yeast: Both active dry yeast and instant yeast work well for this recipe. The yeast creates the air pockets that give focaccia its light and fluffy texture.
All-purpose flour: For the best result, choose an all-purpose flour with as close to 12% protein content as possible. A higher protein flour helps create enough gluten strength for a dough that is airy but still holds together well for sandwiches. If you have it, tipo 00 is also a great flour to use.
Flaky sea salt: A final sprinkle of flaky sea salt on the warm bread enhances the olive oil flavor and adds a delicious texture contrast.
Instructions
Start by adding the lukewarm water, salt, olive oil, and yeast to a large bowl. Whisk everything together until combined.
Add the flour and mix with a large spoon or spatula until all the flour is incorporated and you have a sticky, hydrated dough (1-2). Focaccia dough should be much wetter than traditional bread dough, so do not worry if it feels too soft at first.
Cover the bowl and let the dough rest for 30 minutes. This allows the flour to fully absorb the water and makes the dough easier to handle.
After resting, perform your first stretch and fold. Grab one side of the dough, stretch it upward (3), and fold it over itself (4). Rotate the bowl a quarter of the way and repeat until you have stretched and folded all four sides (5-6).
(Numbers in brackets in the photos represent the cold fermentation option, see next section).
Repeat the stretch and fold process three more times, leaving 30 minutes between each round. These folds replace traditional kneading and help build strength while keeping the dough airy.
After the final stretch and fold, carefully transfer the dough onto a generously oiled baking sheet (7). Press it gently into shape (8). You do not need to spread it all the way to the edges – keeping it slightly smaller will create the perfect thickness for focaccia sandwiches, see the photos (9).
Drizzle the top with more olive oil, cover the dough, and let it proof for about 1 hour(10).
When the dough has finished proofing, coat your hands with oil and gently press your fingers into the dough to create the classic focaccia dimples (11). This also helps distribute the dough evenly across the tray. Drizzle more olive oil on top (12).
Bake at 400°F (200°C) for 20-25 minutes, or until the focaccia is beautifully golden.
Sprinkle flaky sea salt over the warm bread and transfer it to a wire rack to cool. Cooling on a rack prevents the bottom from becoming soggy.
Cold fermentation option
For even more flavor, you can cold proof the dough overnight ((5)).
After the third stretch and fold, place the covered dough in the refrigerator. The next day, complete the fourth stretch and fold before transferring the dough to the baking sheet ((6)).
The final proof on the tray should be around 2 hours instead of 1 hour, as the dough needs extra time to warm up and become airy again.
Then proceed with the recipe as with the same-day option.
Left is cold fermentation, right is not (and one day old). Almost can’t tell them apart!
Substitutions
Flour: Bread flour can be used instead of all-purpose flour if you want a slightly chewier texture. If using a lower-protein flour, you may need slightly less water because the dough will not absorb as much moisture. I highly recommend nothing less than 12% protein though. Norwegian siktet hvetemel is roughly 12% and is what I used here.
Olive oil: Extra virgin olive oil gives the best flavor, but regular olive oil can also be used. Avoid replacing it completely with neutral oils because olive oil is an important part of the focaccia flavor.
Yeast: Active dry yeast and instant yeast can be used interchangeably. If using active dry yeast, it may take slightly longer to activate.
Sea salt: Regular fine salt can be used in the dough, but flaky sea salt is recommended for topping because it adds both flavor and texture.
Variations
This basic focaccia recipe is a perfect base for experimenting.
Make it more luxurious by topping it with some of these before baking:
Fresh rosemary – this is usually my go-to, but kept them simple for the sake of the sandwiches later!
Roasted garlic
Thinly sliced red onion
Olives
Cherry tomatoes, sliced at least in half
Sun-dried tomatoes – another go-to of mine
Parmesan cheese or pecorino romano
Other herbs like sage, thyme or oregano
In my opinion, all the ingredients mentioned above work well together, so you can mix and match to your own desire – but don’t overdo it. Stick to 2-3.
Spicy version: Add sliced jalapeños, chili flakes, spicy peppers, and/or a drizzle of chili oil after baking.
Kid-friendly: Keep the toppings simple with cheese, mild herbs, or serve it plain with butter. The soft texture makes it a great alternative to regular sandwich bread, see below.
Focaccia Sandwich Recipes
To make focaccia sandwiches from this bread, I think the it is perfect to slice in 9 even pieces, and then slice each piece lengthwise to create a top and bottom of your sandwich in a perfect ratio to the delicious fillings below.
Tomato, pesto, and mozzarella focaccia sandwich: Layer the focaccia with pesto, fresh mozzarella (or even burrata), serrano ham, basil, thinly sliced red onion, spinach, tomato, balsamic glaze, and roasted pine nuts if desired.
2. Garlic mayonnaise, cheese, and ham focaccia sandwich: Spread the bread with garlic mayonnaise and add sliced Swiss cheese, ham, spinach, basil, then slices of tomato, radish, and red onion. For Norwegian readers; try using Ridderost, it is amazing on this sandwich!
Equipment
A large mixing bowl is essential because focaccia dough expands significantly during fermentation. A metal baking sheet works especially well because it heats quickly and helps create a nicely browned bottom crust.
If you use stone bakeware, remember that it heats more slowly but retains heat longer. This can affect baking time and may result in a thicker crust or softer interior. Adjust the baking time depending on your equipment.
A kitchen scale is highly recommended for bread baking because flour measurements can vary greatly by volume.
A wire rack allows steam to escape after baking and keeps the bottom of the focaccia crisp.
Storage
Focaccia is best enjoyed fresh on the day it is baked, but it stores quite well. Keep leftovers in an airtight container or tightly wrapped at room temperature for up to 2 days. Avoid storing it in the refrigerator unless it’s really hot, as this can make the bread dry faster.
For longer storage, slice the focaccia into single sandwich servings (9 equal pieces) and freeze it in an airtight bag. Reheat slices in the oven at 300°F (150°C) until soft and slightly crispy again.
The overnight cold fermentation method is also excellent for making focaccia slightly ahead of time, as you have only one stretch-and-fold the day of baking.
Expert tips
Do not add too much flour. A wet dough creates the soft, airy texture focaccia is known for. The stretch-and-fold technique makes it easier to work with a wetter dough.
Use plenty of olive oil. I mean plenty.
Give the dough enough time to ferment to develop the right texture and flavor. I use to say that the dough is done when it wants, no matter how in a rush you are.
Do not skip the final proof. You will notice large air bubbles when you start to dimpling the dough, we want those!
Oil your hands before dimpling the dough so it won’t stick to your fingers and ruin the air bubbles.
Let the focaccia cool slightly before slicing. 10-15 minutes at the very least.
Use good quality olive oil for the best flavor.
Recipe FAQs
Why is my focaccia not fluffy?
The most common reasons are
not giving the dough enough time to rise,
using too much flour, or
not developing enough gluten through stretch and folds.
Focaccia gets its light and airy texture from a combination of proper fermentation and a strong but flexible gluten network that can trap the gas produced by the yeast. If the dough does not rise enough, the yeast will not have enough time to create the small air pockets that give focaccia its signature fluffy crumb.
Make sure the dough has had enough time to proof and look for signs that it is ready, such as a visibly increased volume (doubled in size is a nice rule of thumb), a soft and bubbly surface, and a dough that feels light and jiggly when you move the tray. And it won’t proof if your yeast is too old (in other words; dead), so make sure you use recently bought yeast.
Using too much flour is another common reason for dense focaccia. This is why investing in a kitchen scale is so important when baking bread. Measuring flour by volume can easily lead to adding significantly more flour than intended, especially if the flour is packed into the measuring cup. Too much flour creates a stiffer dough that cannot expand as easily, resulting in a heavier and drier focaccia.
Finally, the stretch and folds are what help develop the gluten structure needed to hold all those beautiful air bubbles. Skipping them or not giving the dough enough time between folds can leave the dough weak and unable to rise properly. To avoid a flat focaccia, follow the resting times, keep the dough hydrated, and handle it gently after the final proof so you do not knock out the air you have worked to create.
Can I make focaccia dough the night before?
Yes. Cold fermentation can also improve flavor and texture, although I personally think the difference is small here. See the paragraph Cold fermentationoption for more information.
Why does focaccia need so much olive oil?
The olive oil creates the signature flavor, tender crumb, and golden crust. If you don’t use enough, you will lack in these three key characteristics of the focaccia.
Can I freeze homemade focaccia?
Yes. Slice it before freezing so you can easily reheat individual portions. I like to slice it in 9 equal pieces, perfect for 1 sandwich each.
Once you try homemade focaccia, it is hard to go back to store-bought bread. The combination of olive oil, flaky salt, and a soft, airy crumb makes it one of the most satisfying breads to bake at home. Enjoy!
Did you like this recipe? Here are more bread recipes I think you would enjoy:
I’d love to hear your thoughts. Comment below or tag me @thegingerwithspice on Instagram. And don’t forget to Pin it for later! To make sure you’re never missing another recipe, please feel free to subscribe to my newsletter.
As thanks, you will receive a free e-cookbook Travels Through the Seasons, with many delicious recipes from around the world that suit different seasons of the year.
To keep the blog up and running this post may contain affiliate links, it will be at no extra cost to you, please read the disclosure for more information.
The best homemade focaccia with a soft, airy crumb and golden olive oil crust, including two delicious focaccia sandwich ideas perfect for lunch.
Focaccia bread
2cups lukewarm water (470 grams)*
2 teaspoons salt (11 grams)
1 tablespoon extra virgin olive oil (14 grams, plus a lot more for greasing the tray and drizzling on top of the dough)
2 ¼ teaspoon dried yeast (7 grams, both active and instant work)
4cupsall-purpose flour (560 grams, or another 12% protein content flour)
Flaky sea salt, to top
Focaccia sandwiches:
Version 1: Tomato, pesto, mozzarella, serrano ham, basil, red onion, balsamic glaze, spinach, pine nuts (roasted, optional)
Version 2: Garlic mayo, Swiss cheese (or Ridderost), ham, spinach, basil, tomato, red onion (pickled is also good!), radishes (optional)
Mix dough: Start by adding the lukewarm water, salt, olive oil, and yeast to a large bowl. Whisk everything together until combined. Add the flour and mix with a large spoon or spatula until all the flour is incorporated and you have a sticky, hydrated dough. Focaccia dough should be much wetter than traditional bread dough, so do not worry if it feels too soft at first.
First rest: Cover the bowl and let the dough rest for 30 minutes. This allows the flour to fully absorb the water and makes the dough easier to handle.
Stretch and fold: After resting, perform your first stretch and fold. Grab one side of the dough, stretch it upward, and fold it over itself. Rotate the bowl a quarter of the way and repeat until you have stretched and folded all four sides. Let rest 30 minutes.
Repeat 3 times: Repeat the stretch and fold process three more times, leaving 30 minutes between each round. These folds replace traditional kneading and help build strength while keeping the dough airy.
Transfer to baking sheet: After the final stretch and fold, carefully transfer the dough onto a generously oiled baking sheet. Press it gently into shape. You do not need to spread it all the way to the edges – keeping it slightly smaller will create the perfect thickness for focaccia sandwiches. Drizzle the top with more olive oil, cover the dough, and let it proof for about 1 hour.
Dimple the dough: When the dough has finished proofing, coat your hands with oil and gently press your fingers into the dough to create the classic focaccia dimples. This also helps distribute the dough evenly across the tray. Drizzle it with even more olive oil.
Bake: Bake at 400°F (200°C) for 20-25 minutes, or until the focaccia is beautifully golden.
After baking: Sprinkle flaky sea salt over the warm bread and transfer it to a wire rack to cool. Cooling on a rack prevents the bottom from becoming soggy.
Serve: Wait 15 minutes before slicing. If making focaccia sandwich, slice the focaccia into 9 equal pieces and then slice lengthwise before adding the fillings. Equal pieces are also great for freezing.
Notes
* I always recommend using a kitchen scale when it comes to baking!
Cold fermentation: For even more flavor, you can cold proof the dough overnight. After the third stretch and fold, place the covered dough in the refrigerator. The next day, complete the fourth stretch and fold before transferring the dough to the baking sheet. The final proof on the tray should be around 2 hours instead of 1 hour, as the dough needs extra time to warm up and become airy again.
Prep Time:10
Resting time:210
Cook Time:20
Category:Appetizer, Breakfast, Lunch, Side Dish, Snack